
 Yesterday morning, this was an empty house. And by empty, I mean not a single stick of furniture or accessory in sight.
By last evening, this was a nicely staged home that is now warm and inviting to potential buyers (I think!).
This lovely house has been on the market for a little while now. It’s a newly renovated, beautifully finished, family home in a great neighborhood. But it didn’t necessarily show that way to those who visited simply because it was entirely empty. And empty can come off as cold, echo-y…and this may surprise you…but smaller than it actually is.
So, with a little rouge and a lot furniture that the client could “beg, borrow and steal” (thankfully he and his friends have good taste, so there were some gems tochoose from!), the key areas in the home are now warm, welcoming and much more inviting to potential buyers.
 Dining room, kitchen, living room, main floor office, one kid’s bedroom and master bedroom were addressed. Very minimal staging was done in the kitchen and all three bathrooms just to add a little something as well. Two bedrooms and the finished basement were left alone.
 The key to staging an empty house is to put just enough in so that potential buyers can instantly see how the room would be used (as in “ah...this is an office. This is the dining room”…etc). You may think that should be obvious, but trust me, it’s not always the case with potential buyers. And if they have to think too hard to figure out what the space actually is, they won’t buy your house.
 Put just enough in for them to get a sense of how their own furniture could fit in that space. When a room is completely empty, it’s kind of like shopping at Costco. You lose all sense of scale. Ever get home and wonder just where exactly you are going to store 72 rolls of toilet paper?
Well, it’s the same here…an empty space can be deceiving and may look small. You may be left wondering if bed will fit in the room because you have nothing to give you a sense of size. So put enough in the room to leave no doubt. A good tip is to not push all the furniture against the walls…leave breathing room to show potential buyers that not only is there room for furniture, but there is plenty of open space to accommodate other things as well.

You also want to put just enough in so that the eye skims over what’s there, rests for half a minute and then easily moves on to admire the selling features – the view, the wonderful flooring, the fixtures or architectural details. Nothing too personal, nothing to showy, nothing too unique that would attract and hold attention.


rouge is happy with the results and hopes that our work may help generate new interest in the house. Another open house is planned for the weekend, so time will tell….
For more about rouge, visit www.littlered.ca or check out past blogs at www.justalittlerouge/blogspot.com

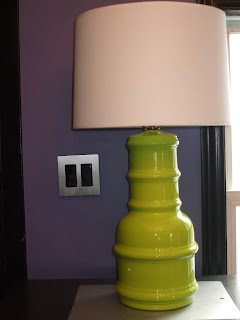
 I wasn’t crazy about the stripes painted on it and would have preferred an all white lamp base. But there were options….

.JPG)